
You Made your Visuals, but Now What? A Step By Step Guide to Teaching Visuals
Visuals are a wonderful way to support independence, increase comprehension, and support task completion. When you look online, there are numerous blog posts, infographics, and ‘how-to’ guides supporting the use of visuals. And we agree! Visuals are amazing.
Unfortunately, all too often, we spend the time putting in place carefully created visuals and yet we receive the feedback “we have the visual, but it doesn’t work”. We tend to believe that visuals have this magical power to transform our children overnight, forgetting that the power isn’t just in the visual, but in our ability to teach the meaning behind the visual.
Yes, it’s true, initially teaching children to use and refer to visuals requires time. However, in the long term it’s well worth it. Spending less than 5 minutes a day to introduce a new visual, role play with existing visuals, and refer to previously established supports allows teachers, therapists, and parents to reduce the amount of verbal reminders, gesture cues, and ‘nagging’ provided day after day after day. So what does this ‘initial investment’ look like?
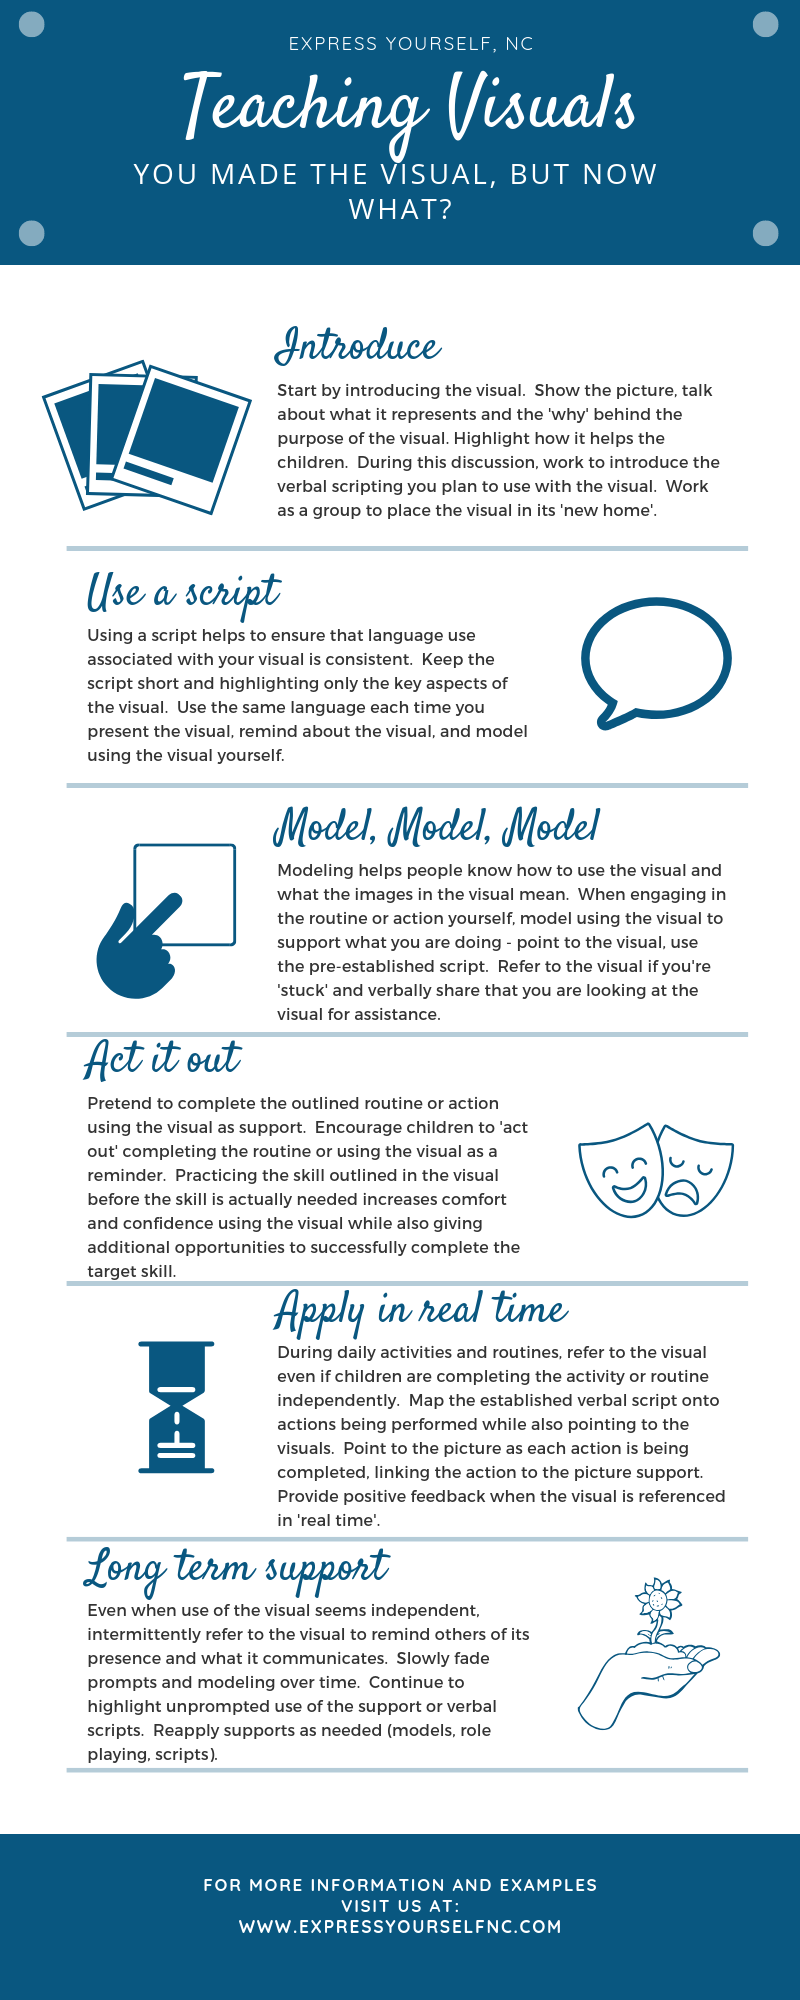
Introduce:
Start by introducing the visual. Show the picture, talk about what it represents and the 'why' behind the purpose of the visual. Highlight how it helps the children. During this discussion, work to introduce the verbal scripting you plan to use with the visual. Work as a group to place the visual in its 'new home'.
Use a Script:
Using a script helps to ensure that language use associated with your visual is consistent. Keep the script short and highlighting only the key aspects of the visual. Use the same language each time you present the visual, remind about the visual, and model using the visual yourself.
Model, Model, Model:
Modeling helps people know how to use the visual and what the images in the visual mean. When doing the action yourself, use the visual while you do it - point to the visual, use the script. Refer to the visual if you're 'stuck' and verbally share that you are looking at the visual for assistance.
Act it Out!:
Pretend to do the routine or action using the visual. Encourage children to pretend they need to do the routine/action. Practicing the skill outlined in the visual before the skill is actually needed increases comfort and confidence both using the visual and successfully completing the routine.
Apply in Real Time:
During daily activities and routines, refer to the visual even if children are completing the activity independently. Map the established script onto actions completed. Point to the picture as each action is being completed, linking the action to the picture support. Provide positive feedback when the visual is referenced in 'real time'.
Long Term Support:
Slowly fade prompts and modeling over time. Continue to highlight unprompted use of the support or verbal scripts. Even when use of the visual seems independent, occasionally refer to the visual to remind others of its presence and its purpose. Reapply supports as needed (models, role playing, scripts).
And because visuals are always helpful, here’s a visual for teaching visuals ;-)
If you enjoyed what you read, subscribe to our blog!